One thing you need to think about while working on a LED strip job is how you will power it. The amount of power available determines if the lights will perform at their finest or malfunction. Continue reading to learn how to connect LED strip lights to a power supply.
2 LED Power Supply Options
When deciding what power supply option is best for you, you can pick between two alternatives.
Hardwiring
Your second alternative is a hardwired power source directly connected to 120 volts AC wires. It then supplies your strips with a low-voltage DC voltage that is safe and efficient.
This power supply is usually smaller. It is easier to conceal behind walls or in other places where it’s needed.
Caged or enclosed power sources fall in this category. They are also called open power supplies. Their enclosure provides passive cooling to keep the unit from overheating.
They have screw-in multiple terminal ports and can be mounted anywhere. These power sources are simple to deal with. Also, they sport a professional look rather than direct plugs. But it will necessitate having main connections to your lights.
You can also cut the connector from the strip and use wire or solder nuts to make wire-to-wire connections. It would also be great if you thought about soldering. Soldered connections are permanent, so they keep current flowing steadily.
Soldering LED strips is not difficult. It’s simple to find the necessary equipment, parts, and supplies for a soldering project. You’ll be able to make an excellent solder connection with some practice.
Power Brick
The first alternative is to use a power brick that plugs directly into a wall outlet. The line voltage reduces to 12 volts DC for the strips.
This is ideal for smaller projects or areas where a well-hidden outlet is required. It makes wiring a lot easier because you don’t have to connect cables directly to main lines.
2 Factors to Consider in Power Supply Selection
Think about the following factors while selecting the most appropriate power source:
LED Voltage
The voltage of your LEDs plays a significant influence in selecting which power source is appropriate for you. You can find the voltage listed under the product details or description when buying your strip lights.
In most cases, the voltage will be between 12 and 24 volts. Now that you’ve got these numbers, you’ll have to inspect if the power supply you’re using is compatible.
You need to make sure your power source is 12 volts if your strip lights are 12 volts. Check the AC’s input voltage to make sure it’s the same as the voltage in your country.
Failure to consider this can result in the LED strip malfunctioning.
Another thing you should consider in LED strip installation is the issue of voltage drop. The voltage steadily decreases as an LED strip runs across a DC circuit.
The longer the strip lighting is, the voltage for each foot diminishes. Thus, one edge of your LED strip lights may glow more than the other.
An LED strip does fine before its voltage drop reaches a certain point. Its brightness lowers significantly beyond the limit and is visible to the human eye.
To avoid a voltage drop in your strip lighting, you can do a few things.
First, you can split the long lengths of the LED strips into shorter ones. Next, connect more parallel wires to every new LED strip from the power source. Repeat this procedure as many times as you want.
You can also connect extra wiring from the power supply to uncut LED strips when the voltage drops.
Power Consumption
When you purchase, read the product description to determine the power wattage of your LED strip lights.
You can quickly calculate the amperage when you’ve got the figure. This will assist you in determining the amperage and wattage of your strip lights. You’ll need to check your power supply to see if it’s compatible.
You can increase the amperage and wattage of the power source but maintain the voltage of the LED strips.
The power supply’s capability to control and release the precise amount of current your LED lights consume makes it possible. So, you don’t have to be concerned about overcharging your LED strip lights.
Contrarily, using a power source that produces less power than what your LED strips consume is unwise. The power supply will run out, resulting in bad lighting and defective connections. The strips may flicker, dim, or do not glow at all.
Helpful Parts to Connect LED Strips to the Power Supply
The following are some helpful pieces that would make it a lot easier for you to connect your LED strips:
EZ Clip Connectors
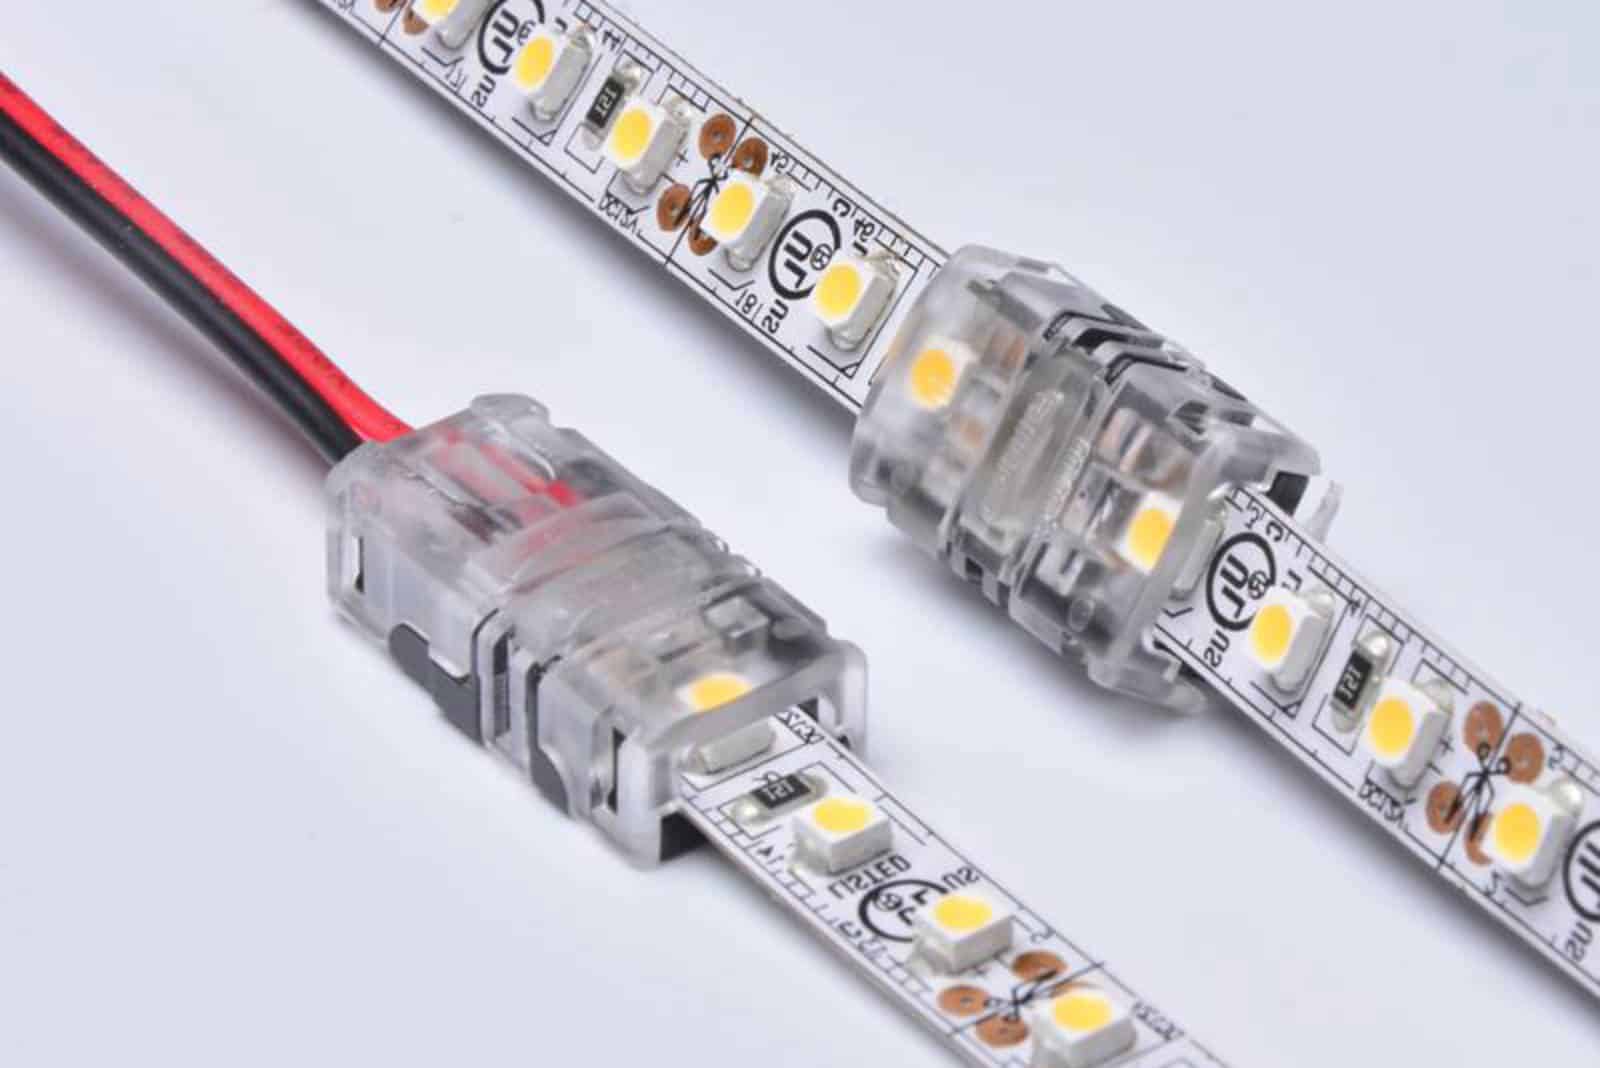
When cutting your strips, these connectors click onto the endpoints. Without soldering, it’s much easier to connect LED strip lights or create gaps in the installation.
Screw-in Connectors
These tiny connectors come in handy when you need to join two sets of wiring together. All you have to do is screw your wire connectors for both male and female ends with ease. This is also a good option when connecting wire ends to either a 2.1 or a 2.5mm socket.
LED Splitters
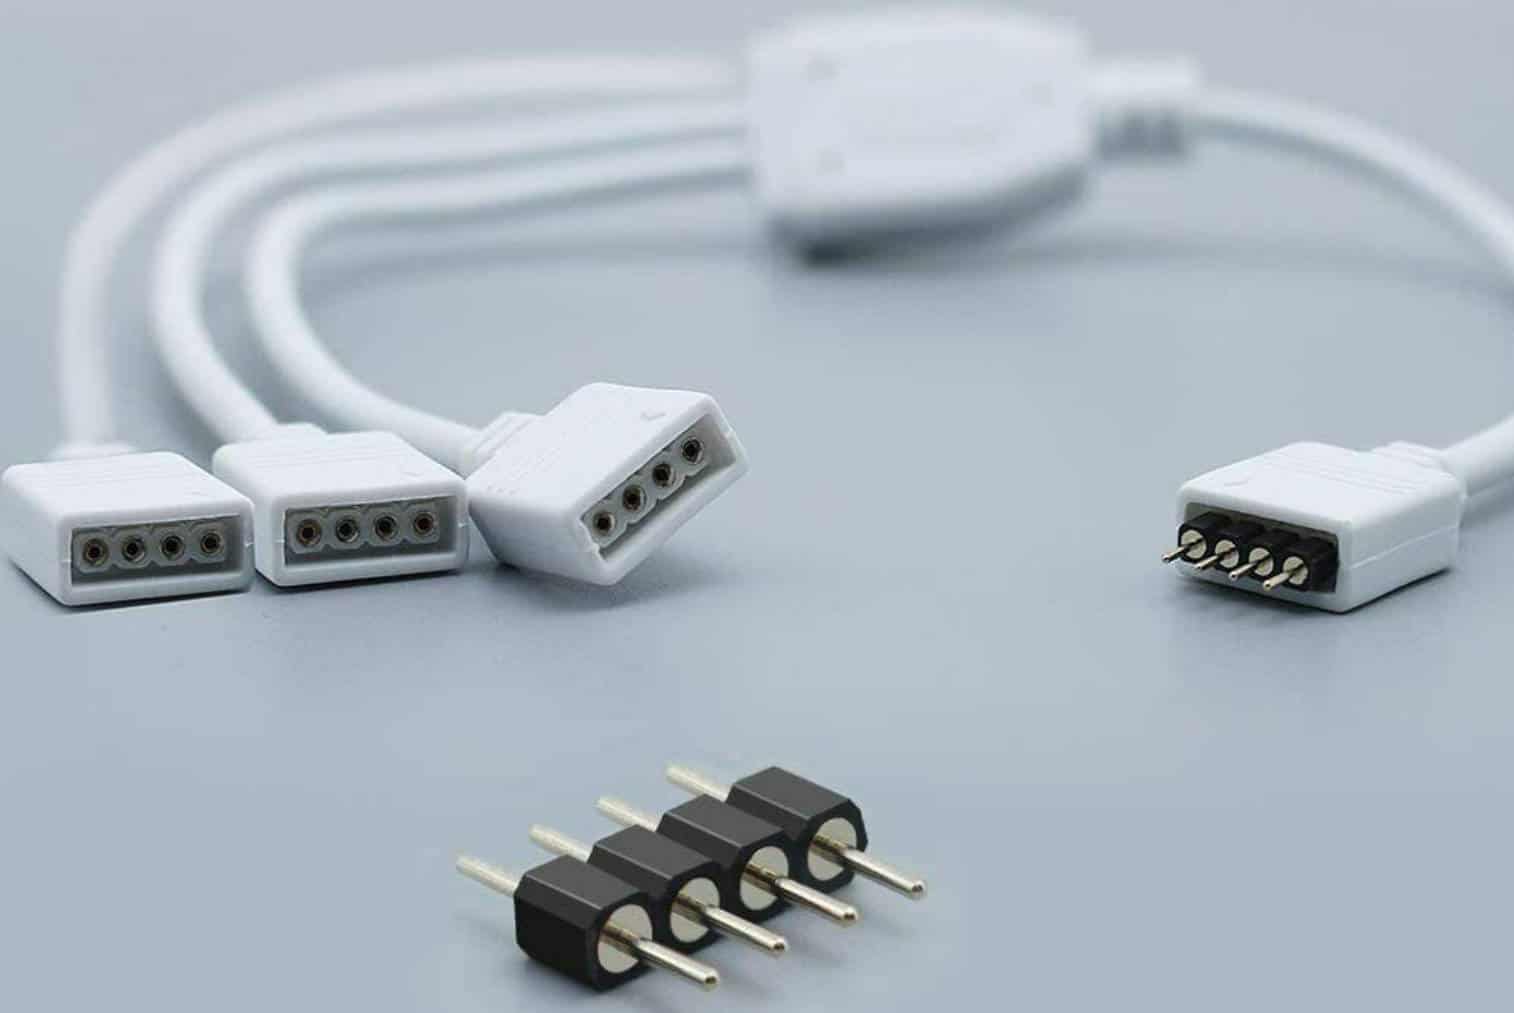
With these connectors, you can simply plug in one electrical source. Then you can connect many LEDs from it to a single power source.
Available options include a single color, RGB, and up to four-output connections, respectively.
4 Techniques to Connect LED Strip Lights to a Power Supply
One LED Strip to One Power Supply
This is the quickest installation technique. All you need is a LED light strip light, a compatible power source, and LED wires in some situations.
Begin by connecting one terminal of the power source to a low-voltage 12 volts or 24 volts LED strip. Connect the other terminal to a 110 volts home power outlet. The light strip’s power source should have the correct voltage and amperage.
Next, pay close attention to the +, – polarities when connecting the power source to the light strip. LEDs could be damaged if you don’t get the polarities right.
An LED strip light with 12 volts or 24 volts is not a wired strip light. Do not connect it to a 110 volts power supply directly.
Two or More LED Strips to One Power Supply
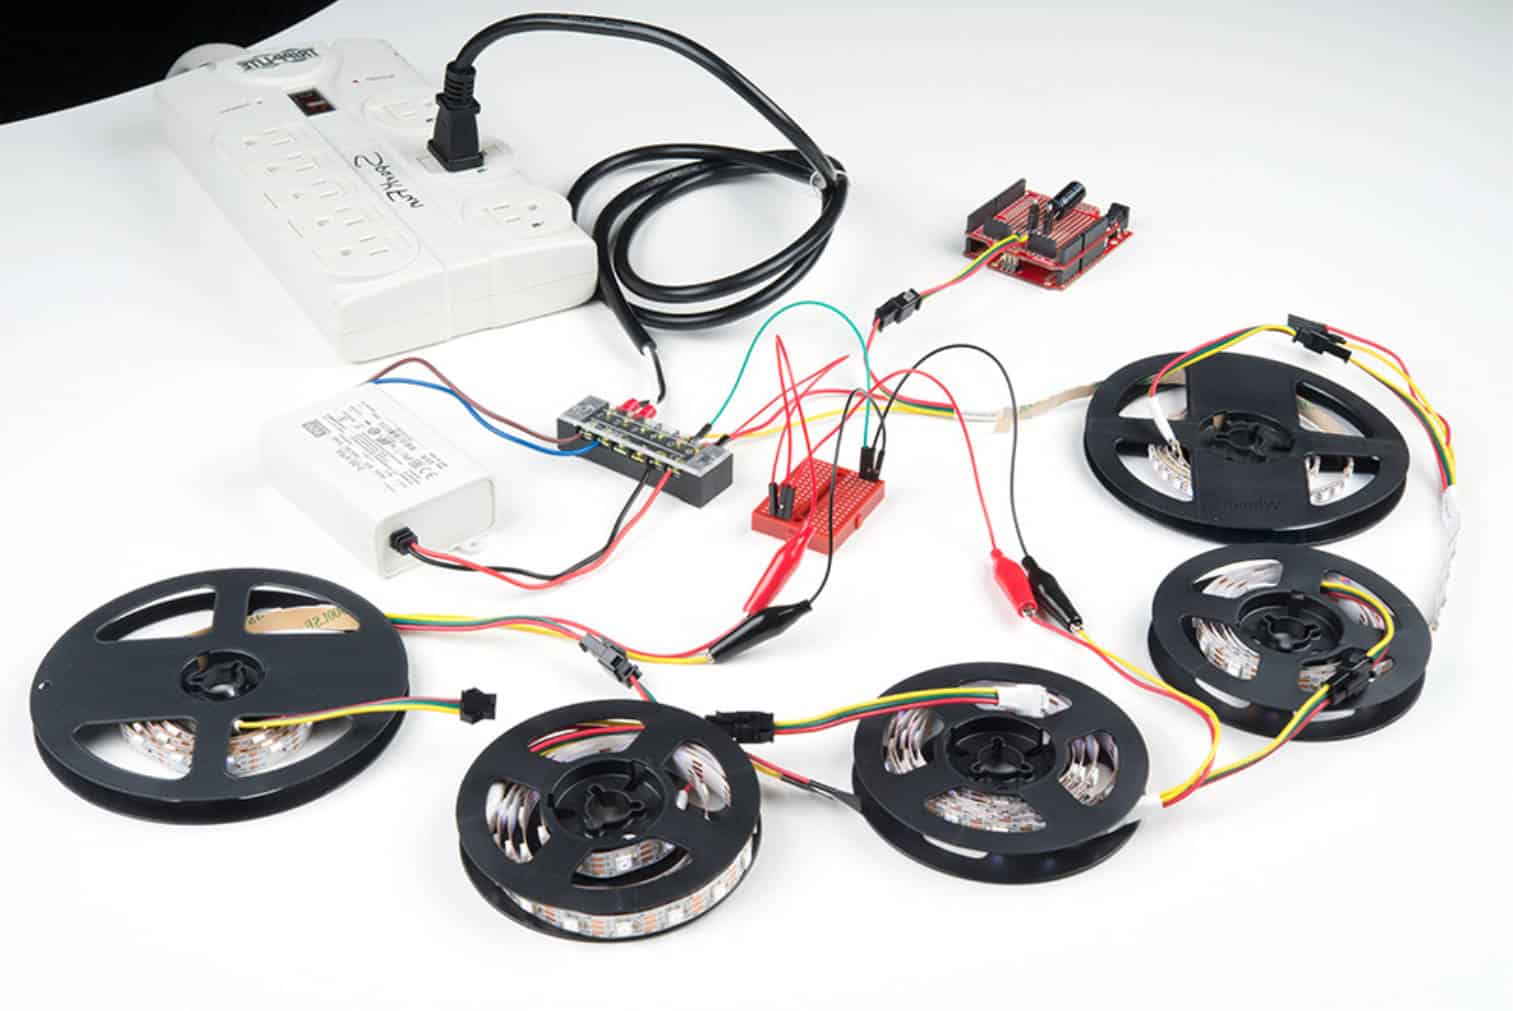
You can attach several LED strips if the transformer and power supply are capable enough. Use a connector block to fasten the strips. It splits the power source into several outputs.
Attach the transformer’s input terminals to the primary power supply. Voltage should be around 240 volts, but it also depends on the type of lighting. Connect the terminal output to the connector block’s input.
Remember that you’ll be needing a connector block based on how many outputs are there. For instance, you should buy a connector block built with three outputs if you need three LED light strips.
If you want a plug-in technique, you can run your strip connections into a splitter cable. This will easily fit into the power brick’s male socket.
Since splitter cables can have up to four outputs, you can have four strips connected to the same power supply at once.
You’ll need to connect all of your strip wires to the power supply’s output wires. Use wire nuts or connect all the strips to a single positive and a common negative wire for a one-to-one linkage with the power source.
RGB to One Power Supply
You’ll need an LED controller to regulate the colors that lie beneath the RGB LED’s performance. It’s usually placed between the LED strip and the power source.
Connect the output terminals to the controller and the input terminal to the main source. This links the LED strip light to the main supply. You also need a receiver to obtain a signal when your controller is wireless.
You can control some functions with several LED receivers, such as dimming, color adjustment, and lighting effects up to about 20 meters.
In addition, the LED color you want to control determines which channel you want to control. This is because one receiver channel can handle one color only. RGB LED lights need a minimum of three.
Dimmable LED to One Power Supply
You have to install a dimmer between the LED strip and the power source for this to work. Next, link the dimmer switch. You have to connect the transformer’s input terminals to the power source. Also, the output terminals should be attached simultaneously.
You can modify the level of brightness of LED strip lights through the dimmer switch. Colors include white, green, blue, red, UV black, and more.
LED dimmers are also known as switch controllers. You can use a remote to operate the majority of controllers. There are also keys or control buttons on some controllers.
For customizable white strip lighting, you’ll need a white LED controller. The controller adjusts the brightness of the warm and cool white diodes. This results in a variety of white color temperatures.
The installation of a tunable controller is the same as with a dimmer. The only exception is that the controller has an additional negative channel.
Summary
The use of LED strips as a light source is well-known. With their many purposes, you should learn how to install them correctly to enjoy all their potential benefits. Now, you have probably already figured out how to connect LED strip lights to a power supply. So, have no fear!


