
Whether you want to install an LED light at the exterior or interior of your car, the methods are easy! LED lights have been known as energy-efficient and less costly. Also, it has a longer lifespan than other lights. Keep reading to learn how to install LED lights in car!
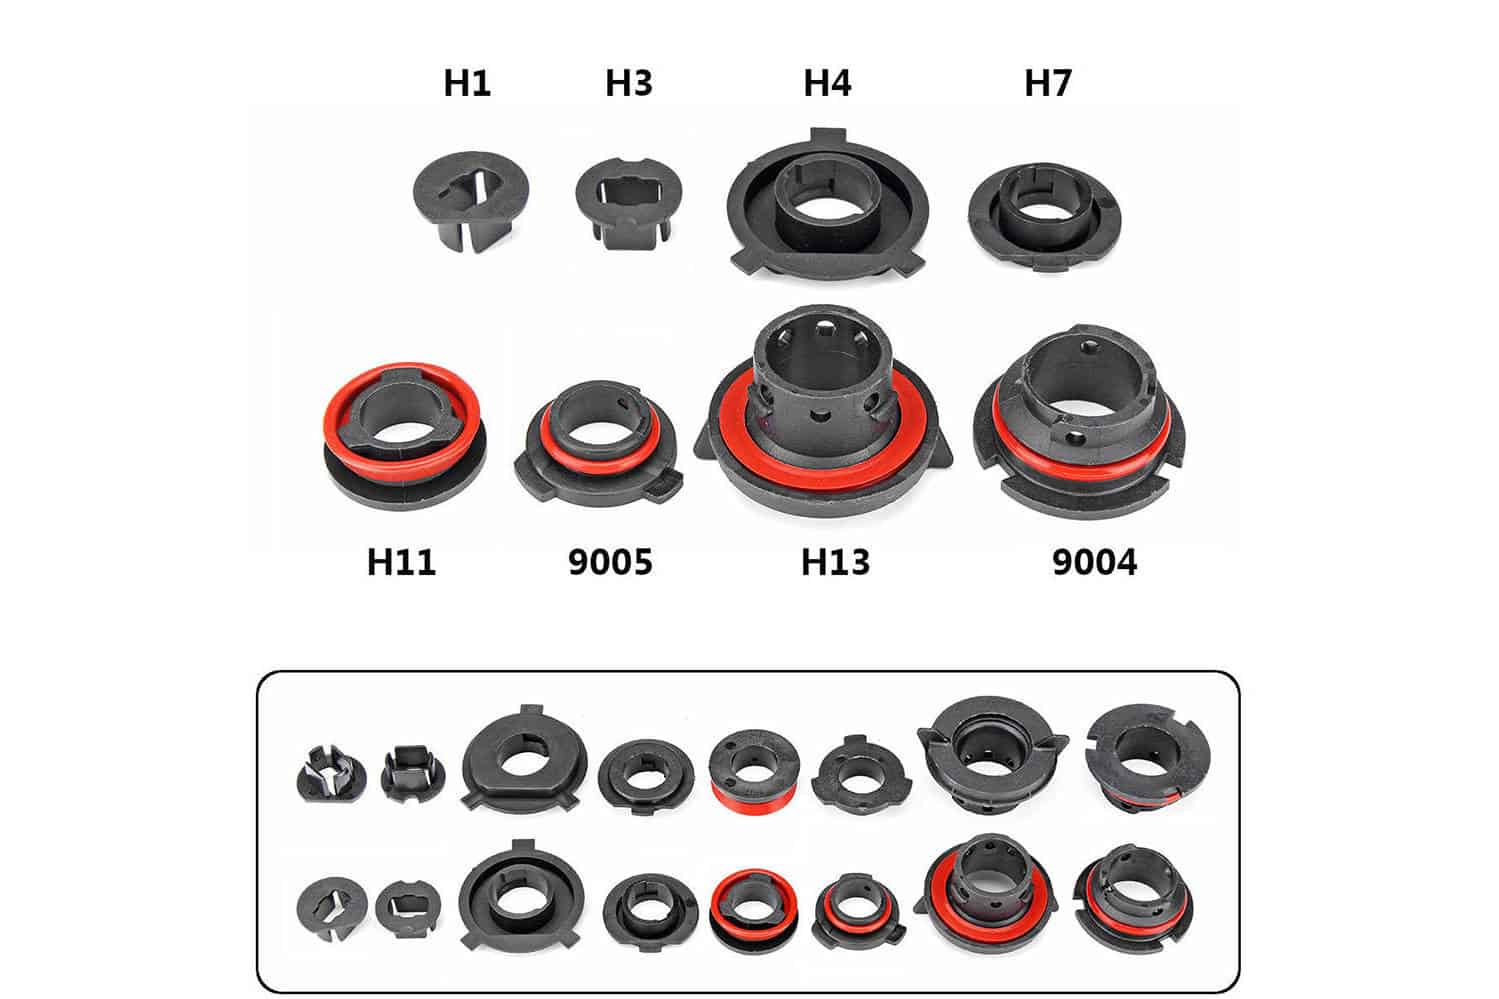
For H4 and H7 Housing
Step 1: Locate where are the old headlights are placed
Once you have the right LED headlights for your vehicle, locate your old headlights. For some housings, they are located under the rubber gaskets.
These rubber gaskets protect the headlights from water. Remove the rubber gasket by simply pulling it off. Proceed to the next step once you are finished.
Step 2: Pull the wiring harness connected to the headlight
Inside the rubber gasket is the wiring harness. Pull these wiring harnesses connected to the headlight. Next, look for the little clip on the housing and lift it off. Now, remove the old bulb out of the headlight. Make sure, though, that you don’t touch the bulb.
Step 3: Mount your LED headlights
Now, mount one of your LED headlights in the housing where the old bulb used to be in place. You need to twist the collar ring out of the LED headlight and place it in the housing to do this.
Secure the collar by pushing back the little metal clip. Gently position the LED headlight to the socket. Twist it clockwise so that it will lock into place. Don’t forget to connect the plug.
After plugging in the LED bulb, you can put back the rubber gasket. To see how this is done, you can watch this video:
For H11 Housing
Step 1: Remove the old bulb out, then place the new one
Push down the knob on the connector. Twist the old bulb counterclockwise to remove it. Next, insert the new one inside the housing.
Make sure that you line up the tab part of the locking ring against the locking grooves of the housing. Press the LED bulb while turning it clockwise. The flat sides of the LED bulb must be in the 3 o’clock and 9 o’clock positions.
As much as possible, turn the LED bulb gently since its locking ring is thin. Exerting too much force can damage it.
Step 2: Plug in the LED bulb
Plug in the LED bulb by connecting it to the original vehicle connector. Put back the rubber gasket, if there is any. Test your new LED headlight by starting the car.
Check if both the low and high beams of your vehicle are working correctly. Ensure that there is no flickering and the car dashboard is not signaling any error warning.
Watch this video and look at how the LED installation is done.
For H1 Housing
Step 1: Remove the dust cover
First, remove the dust cover located behind the headlight assembly. Turn it clockwise, then gently pull it out. After that, remove the blue wire and the black wire. The blue one is the positive wire, while black is the ground wire.
Step 2: Remove the old bulb and plug the new one
To remove the old bulb, unhook the screen securing the bulb. Once you have opened the screen, you can unplug the bulb and take it off. Plug the LED bulb by connecting its positive wire to the positive wire of the vehicle.
The positive wire of the LED bulb is red. Next, connect the two ground wires, which are both black.
Step 3: Install the LED bulb
Once you are done plugging, install the LED bulb. If the LED bulb is longer than the housing, you will have to loosen the housing first. Simply remove the two screws at the top of your housing.
After that, install the LED bulb by aligning its two notches against the grooves of the housing.
Insert the LED bulb into the housing and secure it with the metal spring by attaching it to the hook. If you have difficulty fitting it, you can adjust the LED bulb. You only need to pull the bulb and turn. Put back the dust cover after you have placed the LED bulb properly.
For Car Interior
Step 1: Determine the areas where you want to put the LED strips
Before putting the LED strips, you must determine the areas in your car where you can put LED strips. As much as possible, there must be enough space so the strips won’t be too hard to install.
Also, look for a place where you can mount your control box. Remove the dash panel to make it easier to connect and run the wires.
Step 2: Mount the LED tubes and secure them using zip ties or mounting screws
Once you have chosen the locations, mount the LED tubes and secure them using zip ties or mounting screws. After placing the tubes in place, put back the dash panel if you have removed it.
Hide the excess wiring under the dash panels. Also, ensure that the wires are not on the path of the moving parts like pedals and steering wheel.
Step 3: Power your LED tubes using the cigarette lighter adapter
Insert the LED strips’ power and black wire into the cigarette lighter’s connectors. Next, plug the adapter into the cigarette lighter. Clean the area by zipping away from the excess cables. You need to clean the site so that the wires won’t interfere with the moving parts inside your car.
Step 4: Mount the control box
Place a 3M tape at its back and stick it in your desired location to mount the control box. Power your LED strips and check if all of them are functioning.
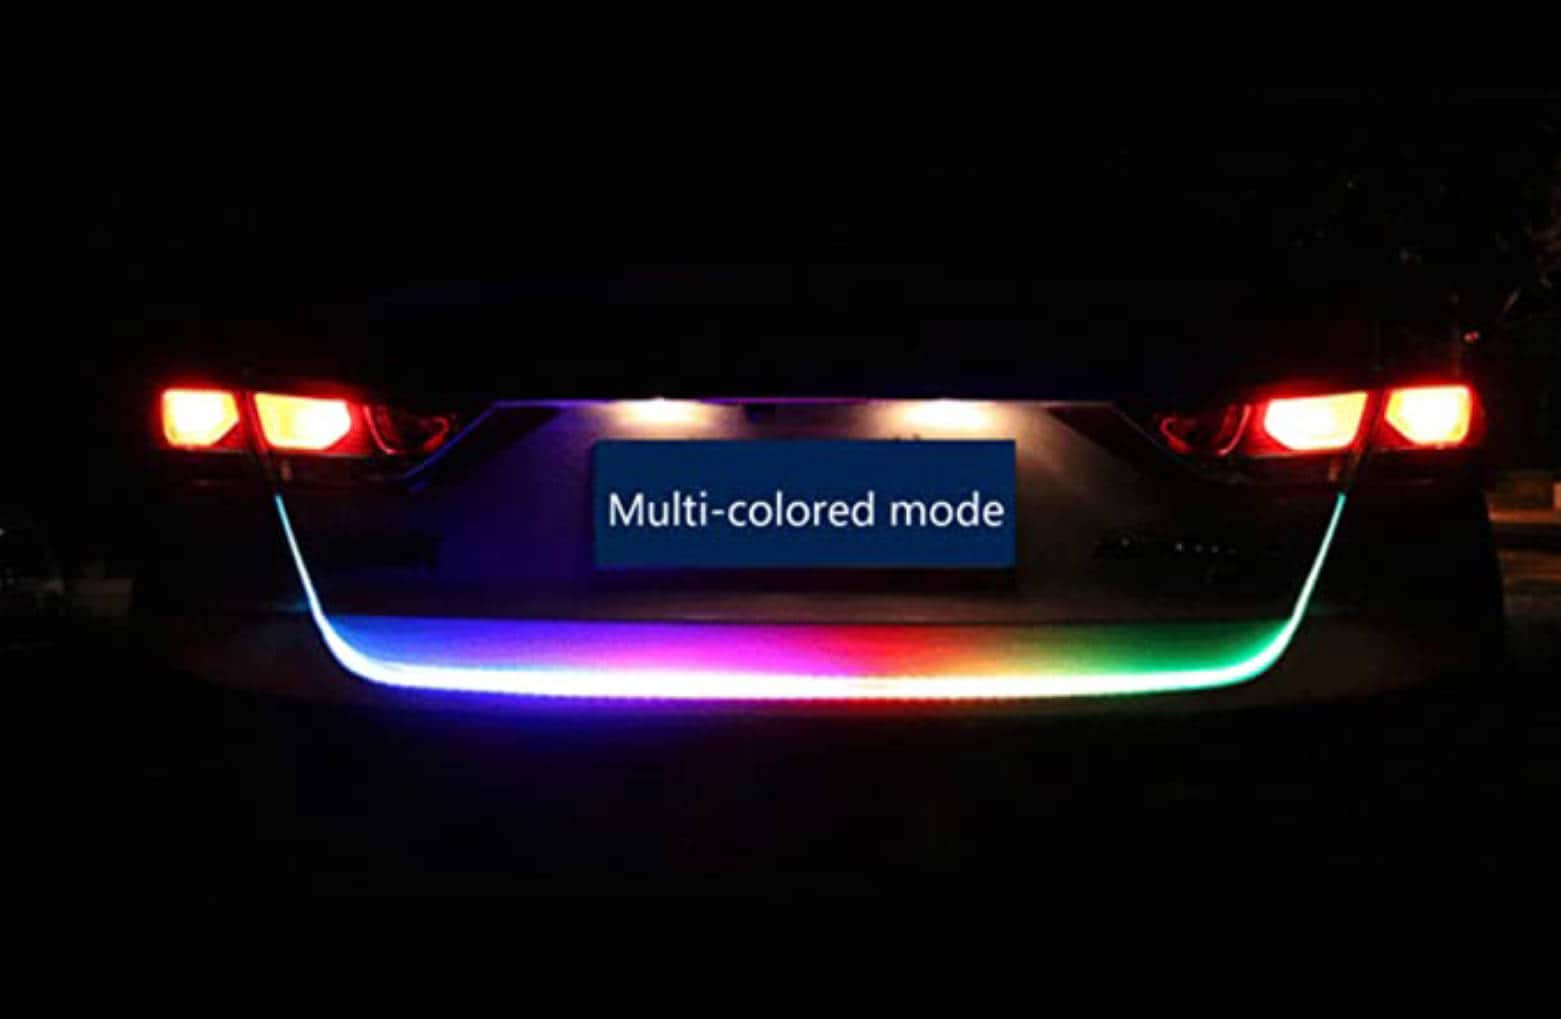
For Car Trunk
Step 1: Remove the fixed suede buckle located at the left side of the tail box
First, you need to remove the fixed suede buckle that you can find on the left side of the tail box. Use a tool that can remove it. Next, pull out the sealing strip of the tailbox.
Once you open the suede of the tailbox, you will find the wiring harness plug connector. You need to remove the wire harness insulation to prepare it for wiring.
Step 2: Connect the wires
Now, connect the original line color to the modified wiring color. Connect black to black, green to white, black and green to red and cyan, and red and blue to yellow.
The 1.5 m delay line should be connected with the yellow line with an “R” mark. After you are finished with the wiring, pull the extension line from the left to the right side of the tailbox.
Step 3: Remove the fixed suede buckle located at the right side of the tailbox and do the insulation
Using the prying tool for the suede buckle, remove the fixed suede buckle at the right side of the tailbox. Look for the wire harness plug. Do the insulation by connecting the extension line to the red-black line. Next, put back the rubber strip located at the rear of the tailbox.
Step 4: Connect the plug on the lamp and install the LED strip
Connect the plug on the lamp by passing it through the hole that you will see on your tailbox. Next, plug in the host. After that, open the gum located at the back of the LED strip for installation.
Stick it out to your car trunk. Make sure that the LED strip won’t affect the closure of the tailbox. Test the LED strip to work correctly on your car trunk after installing.
Is LED better than halogen headlights?

LED lights are becoming more popular in the automotive industry. It is because they provide brighter lights than halogens. Aside from that, they use less energy and have a longer lifespan than other headlights. When using LED headlights, you will also notice less fuel consumption.
The bright light of LEDs helps to see the markings and warning signs while driving on the road. Also, LED light can give you a broader coverage at night, making you see more of your surroundings.
In contrast, halogen light’s range is limited, only making you see what is in front of your car.
However, replacing your LED headlights can be more expensive than halogen replacement. Before replacing your headlight with LEDs, you must also make sure that it is legal in your country.
Some countries prohibit using LEDs as headlights because they tend to cause accidents. The bright light makes it difficult for the drivers of the passing cars to see the path.
Summary
Have you learned how to install LED lights in car properly? Because of its benefits, many drivers are converting their halogen headlights to LEDs.
Also, LED strips help add unique designs to the exterior and interior of your car. If you always drive at night, LED lights are a must-have!